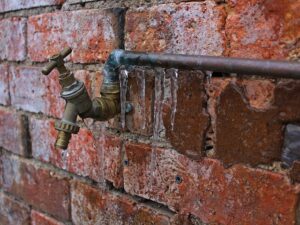
Winterizing Your Home – Mitigating Water Damage From Frozen Pipes
 Recent studies have suggested that global warming is heating both the North and South poles. At the same time, the cold weather is becoming more extreme. As temperatures plummet during the winter season, the risk of water damage also increases, specifically because of frozen pipes.
This issue affects residential and commercial properties alike. It has become crucial for property owners to winterize their water pipes properly. Take the recent cold spell in Texas, for example. The average temperature during the winter for the state is 42 to 36° F. However, during the last storm, the mercury dropped to 11.8° F.
Under such circumstances, neglecting winterization, especially when it comes to pipes in exposed areas. As temperature increases, the likelihood of water inside pipes freezing over and exploding. Many states are also upgrading their residential and commercial code requirements to insulate pipes – at least those exposed to the environment.
The goal is to ensure that water from exploded or leaky pipes doesn’t damage the house’s foundation rake up high water damage restoration charges or lead to mold growth. Our experience and expert studies suggest that whenever the mercury drops below 20°F, pipes start feezing up.
You should consider the following winterizing steps to deal with frozen pipes now or when cold spells begin.
Preventing Frozen Pipes
Insulate Your Pipes
Perhaps the easiest and most effective way of keeping your pipes from freezing over is to insulate them PE Pipe Insulation works best in most cases. You can also go with foam insulation; however, that procedure is mostly useful for pipes laid inside the building, and the insulation will have to be changed regularly.
PE insulations are usually available in two types;
- Foam rubber sleeves
- Insulated wraps.
Both of these insulations help regulate the temperature inside and outside the pipes. The water from your pipes will be extremely cold but won’t cause them to freeze easily, and, therefore, the pipes won’t explode.
Remove Debris From Crawlspace
Crawlspaces are known for accumulating debris and water from melting snow. These usually act as vents that facilitate airflow underneath the house. However, when snow and debris get in these crawlspaces, it runs the risk of introducing water damage to your house’s foundation.
Furthermore, the cold air flowing through these spaces can circulate in the house and lead to frozen pipes. In areas where the frost settles and the winters are harsh, you should consider blocking the vents and boarding up crawl spaces to keep the cold air out.
Let Your Faucet Drip
It might feel like a waste of water, but you can collect the slowly dripping water in a bucket. You must let your kitchen and bathroom faucets drip a bit, especially through the night. By doing this, you are alleviating the pressure on your pipes. The movement also means that water won’t freeze over within the system easily.
Keep Interior Doors Open
You might consider keeping doors to rooms closed through the winter season to restrict airflow. However, the closed room restricts cold air as well as hot air. You may feel that your room gets warm for a short while; however, after a few minutes, it will get colder than before unless you have a heat source.
Keeping doors to rooms open while having heating impacts the water pipes in your bathroom and kitchen. The heated air circulates throughout the house instead of just a specific room.
Empty the Garden Hose
One of the most exposed pipes in your home or office is the garden hose or sprinkler system. If you get such intense winters, your lawn might not need watering. You should shut off the water from the main valve heading to your lawn.
There is usually a single “handle” or lever that you need to turn to shut the water off. After closing the water supply, open the hose valve to remove excess water from the pipes.
Thawing Frozen Pipes
If you believe that your pipes have frozen during the winterization process, you must thaw them immediately to avoid water damage. Start by making sure that the water inside is frozen. Simply touching the pipe wouldn’t be much help, especially if it’s a U-PVC pipe.
Turn on your faucet, and if you see nothing more than a trickle come out, you have a frozen pipe.
You will need to melt this ice – and the best way to do that is by using a heat gun or an electric heating pad. Be careful with the heat gun, though. It’s quick but can also damage the pipe’s integrity. A hairdryer should also be up for the task. However, it may take a while to thaw the ice. Do not use open-flame devices.
Apply heat to the top of the pipe until the ice melts and the water heats up. The heated water will melt the ice below, and you will start seeing normal water flow. Remember, though, that if one pipe has frozen, there will likely be other frozen pipes as well.
Unfortunately, there might be times where despite preventative measures, pipes may freeze or even burst. If more than one pipe has frozen, you may not be able to thaw them in time. We recommend getting professional help in this case as soon as possible to avoid water damage or mold.
911 Restoration technicians can be at your place within 45 minutes for immediate intervention and can prevent your property from sustaining intensive damage. Give us a call, and we’ll be right over to help you mitigate water damage quickly and cost-effectively!


